Want to secure your property with a secure fence gate DIY project? Many homeowners decide to build or replace a secure fence gate when they notice issues around their house, such as an old or rotting gate. This guide will teach you how to plan, measure accurately, choose the best materials, and install a gate that lasts.
Key Takeaways
- Start with accurate measurements and robust materials to ensure a sturdy and secure fence gate.
- Incorporate proper hardware installation and maintenance routines to ensure long-term functionality and prevent sagging.
- Enhancing security features like locks and anti-sag kits will protect your property and ensure the gate remains functional over time.
- Incorporating a simple or creative idea can enhance the durability or appearance of your DIY fence gate.
Planning Your Secure Fence Gate Project
Secure fence gate diy – key takeaways
Thorough planning is the first step in building a secure fence gate. Begin by choosing the exact location for your fence, which will determine measurements, materials, and tools. Even without professional carpentry skills, a bit of experience and meticulous planning can ensure success.
Gather all necessary tools and materials before starting construction, including wood, mounting hardware, and the tools for cutting and assembly. Having everything ready ensures a smooth construction process without interruptions. Preparing a detailed cut list with specific measurements for each piece will help streamline the building process and reduce mistakes.
Measure Gate Opening Accurately
Accurate measurements ensure your gate fits perfectly and functions smoothly. Measure the gate opening multiple times at different points—top, middle, and bottom—to account for variations and ensure a tight fit.
Use the following tools and guidelines to obtain precise measurements for your gate:
- Use a good measuring tape and a level to obtain precise measurements.
- Record the length of each board needed for the frame and pickets to ensure accurate cuts and a proper fit.
- Make your gate about 1/4 inch narrower than the opening to allow for wood expansion.
- Leave space needed for hinges to prevent potential issues during installation.
Selecting the Right Materials
Choosing the right materials is key to a durable and attractive gate. Cedar is popular for its natural resistance to decay and weather conditions, making it stable and pleasing in appearance. Pressure-treated lumber is also a good choice for the frame to enhance durability. If you use wet pressure-treated boards, allow them to dry before installation to prevent warping and ensure a secure fit.
Hardware selection is equally important. The hinges, latches, and screws you choose will affect the gate’s functionality and longevity. Opt for high-quality, weather-resistant hardware to ensure your gate operates smoothly and withstands the elements.
By choosing robust material and hardware, you set the foundation for a gate that will last for years.
Tools You Will Need
The right tools are essential for a successful DIY fence gate project. Basic tools include:
- A circular saw for cutting wood
- A drill for pilot holes and screws
- Pocket holes for strong joints Each tool ensures your gate is built securely and accurately.
For example, a drill/driver is specifically used to drive screws into the frame during assembly, ensuring a tight fit.
Building the Gate Frame
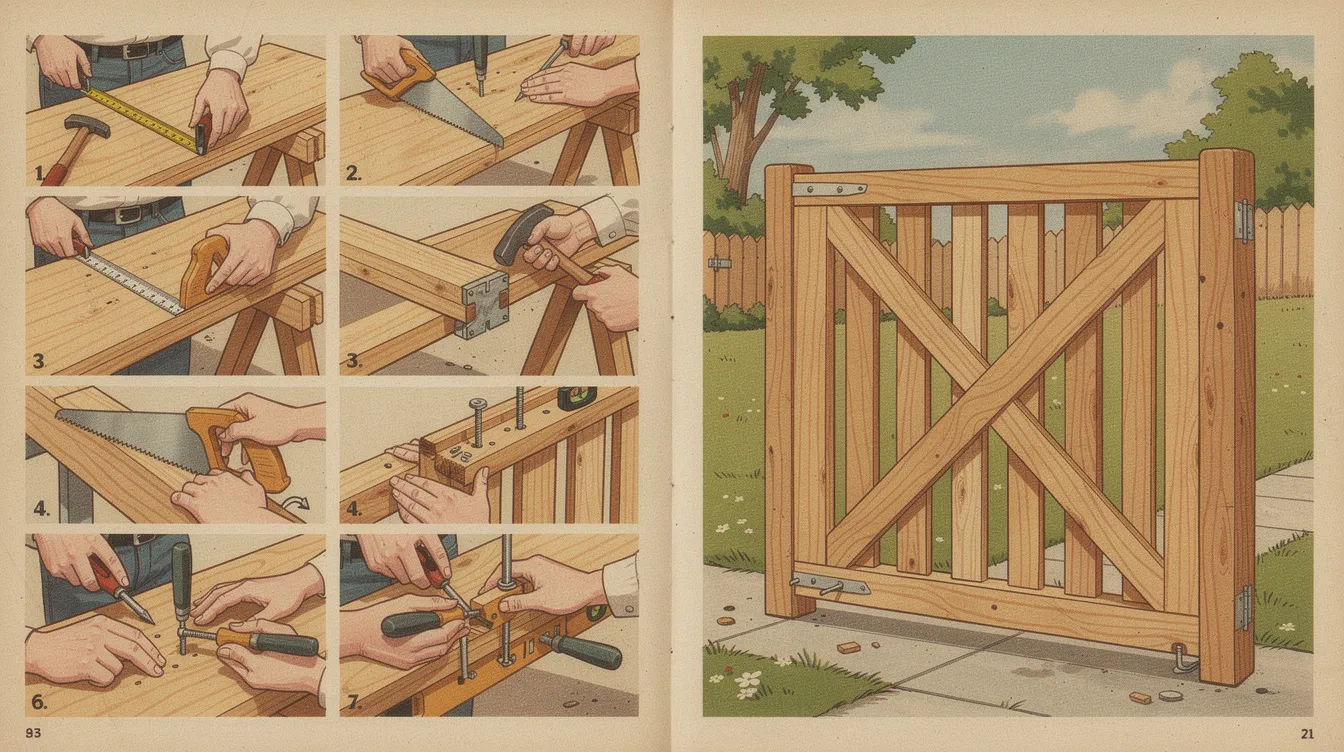
The gate frame is the backbone of your gate, and quality construction is crucial. A well-built frame supports the gate and prevents sagging. Consider the following for building a sturdy gate frame:
- Use sturdy materials like cedar 2x4s to ensure durability and stability.
- Decide the spacing between fence posts.
- Leave a gap for hinges and wood expansion before cutting.
Using a block as a spacer can help ensure even spacing between pickets or frame components during assembly.
Structural elements like diagonal cross braces counteract gravity and maintain the gate’s shape. A low gate frame keeps the boards in place, maintaining stability under stress. Focusing on these details ensures a strong gate frame that resists sagging.
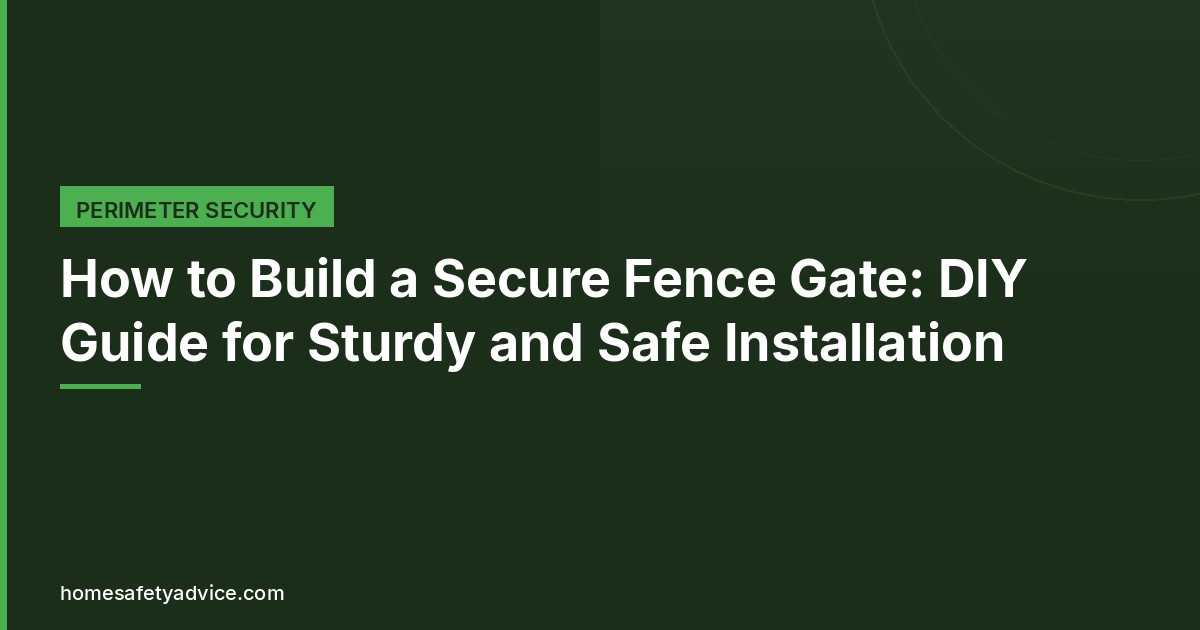
Cutting and Assembling Frame Pieces
Cutting and assembling the frame pieces is where your gate starts to take shape. Follow these steps:
- Determine the dimensions of the frame pieces.
- Cut the side pieces 3 inches less than the full height of the gate.
- Match the top and bottom boards to the full width of the gate.
- Use a miter saw for the angled crosspiece to ensure a perfect fit within the frame.
Use pocket holes to securely join the pieces during assembly, with the pocket holes facing inward. Check the frame for squareness by measuring diagonally from corner to corner before finalizing the assembly, ensuring it is perfectly square and ready for the next steps.
Adding Diagonal Cross Brace
A diagonal cross brace is crucial for maintaining the gate’s shape and preventing sagging. It transmits weight towards the hinges, keeping the gate square and stable. Position the brace to angle downward towards the lower hinge, creating compression. A compression brace running from the top corner to the bottom hinge helps prevent a sagging gate by pushing against the frame and transferring weight to the bottom hinge.
Secure the brace using durable, weather-resistant exterior grade screws. Drill one pocket hole into each corner of the angle braces for secure attachment, effectively counteracting gravity and maintaining the gate’s integrity over time.
Attaching the Gate Boards
Secure fence gate diy – building the gate frame
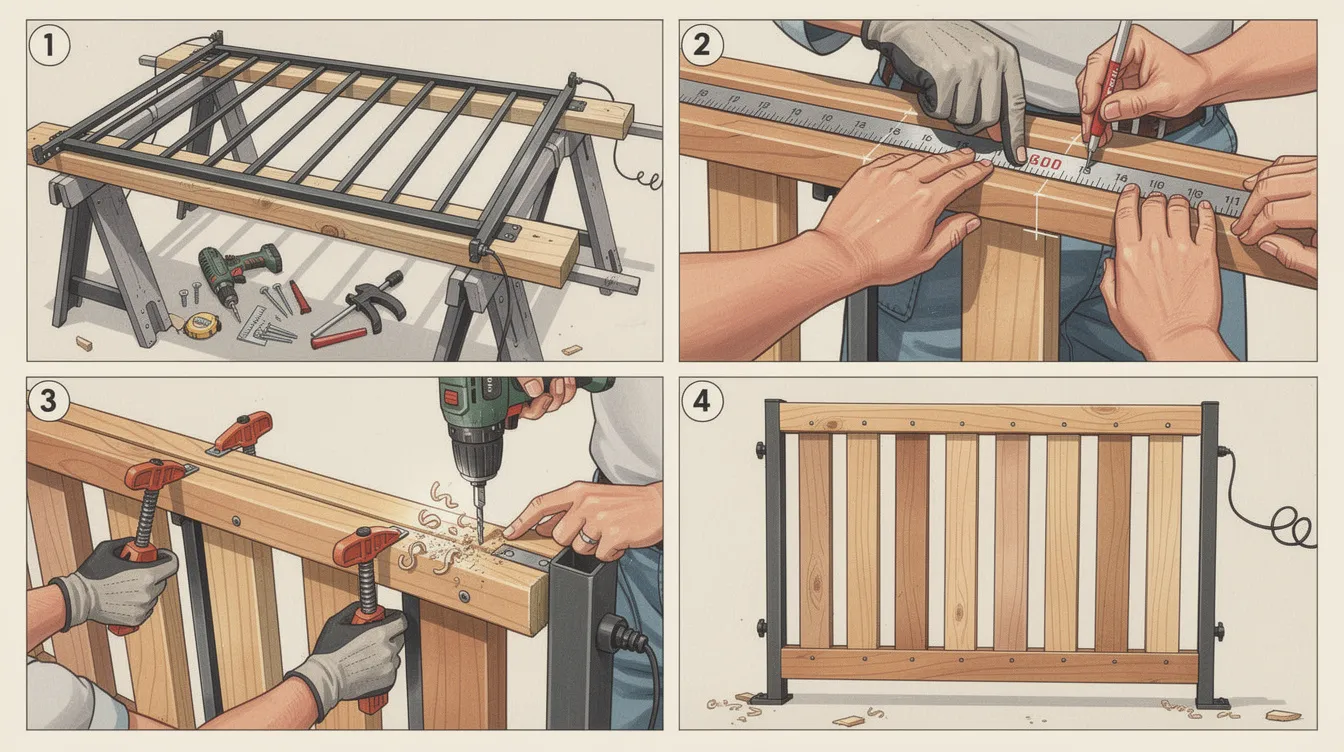
Attaching the fence boards to the gate frame is the next step in creating a professional-looking gate. Follow these steps:
- Use durable, weather-resistant materials like cedar or pressure-treated lumber.
- Mark a straight line on the frame for even placement.
- Pre-drill holes to prevent splitting.
- Secure the boards to the frame.
Each picket should be aligned carefully and securely attached to the frame for stability and a uniform appearance.
Use a drill/driver to secure the boards to the frame, driving screws through the pre-drilled holes. Clamps can help hold the boards in place, ensuring a tight fit and professional finish.
This careful preparation and attachment process will give your gate a polished, sturdy appearance using the right gate material post.
Pre-Drilling Holes
Pre-drilling holes avoids splitting the wood and ensures a secure attachment. This practice allows for more accurate screw placement, enhancing the overall quality of the assembly.
This extra step might seem minor, but it significantly contributes to the durability and professional look of your gate.
Aligning and Securing Boards
Uniform alignment of the boards is essential for a professional finish. Use a straightedge for even positioning and secure the boards with exterior grade screws to withstand weather conditions and remain durable.
This attention to detail in alignment and securing will result in a solid gate design that is not only sturdy but also aesthetically pleasing.
Installing Hinges and Hardware
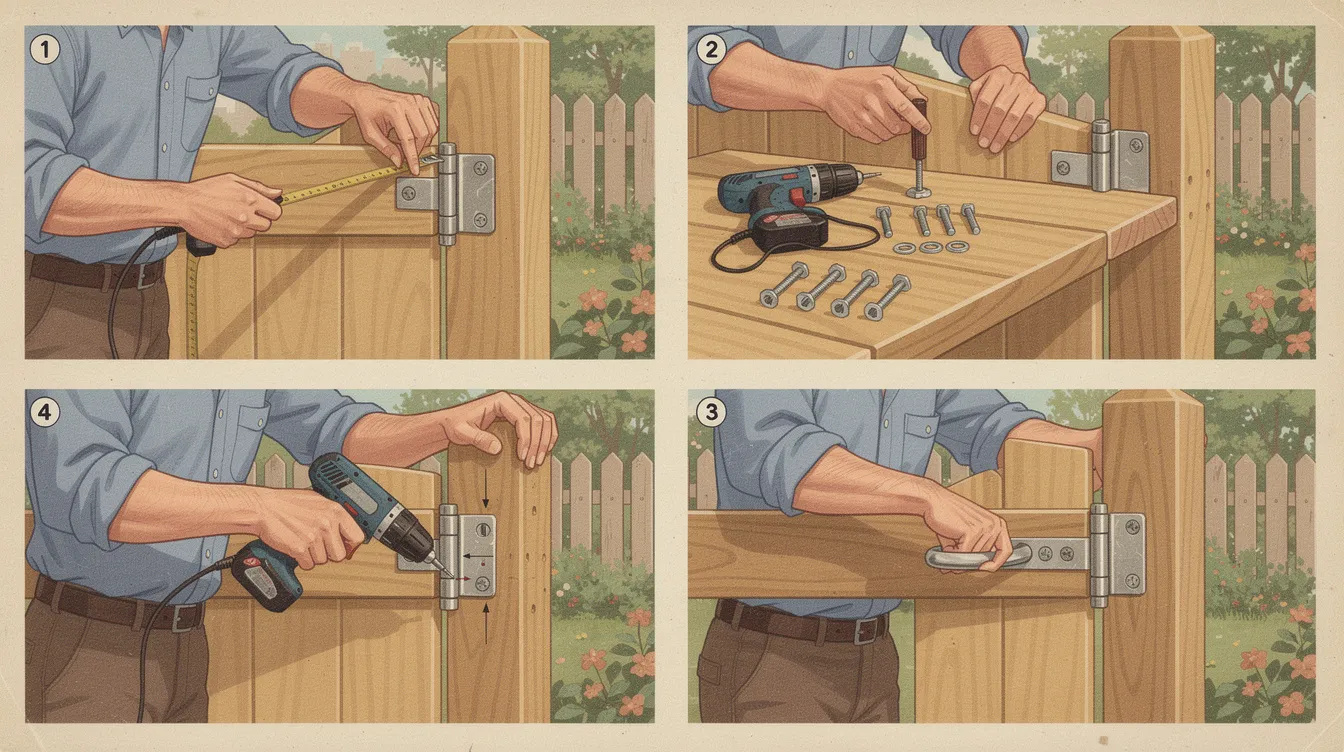
Correct installation of hinges and hardware is crucial for the gate’s functionality and longevity. Loose hinges can cause sagging, making the gate difficult to open and close. When installing, be sure to leave a small gap on the hinge side to ensure smooth operation and prevent binding. Regularly check and maintain the hinges to prevent this issue and ensure smooth operation.
Proper hardware installation ensures that your gate remains secure and operates efficiently for years. To install your hardware correctly, follow the manufacturer’s guidelines.
Hinge Placement and Installation
Hinge placement is vital for optimal gate function. To ensure proper installation:
- Attach the hinges to the strongest sections behind the fence boards for stability.
- Use two hinges per gate for adequate support.
- Mark screw locations.
- Drill pilot holes to prevent wood splitting before installation.
Decide the swing direction of the gate beforehand for proper hinge installation. Spring-loaded self-closing hinges can offer additional ease of use.
Choosing and Installing Latches
Choosing the right latch is important for security and ease of use. Here are some key points to consider:
- Reversible latches reduce strain on hinges.
- Follow the hardware instructions for installation.
- Cane bolts are necessary for double gates to secure the inactive latch side.
Mount latches at a height of 36-42 inches from the ground for optimal access. Careful installation ensures smooth and secure latch function. If your latch or lock becomes damaged, you can often replace just the hardware instead of the entire gate, saving time and money.
Ensuring Long-Term Performance
Secure fence gate diy – installing hinges and hardware
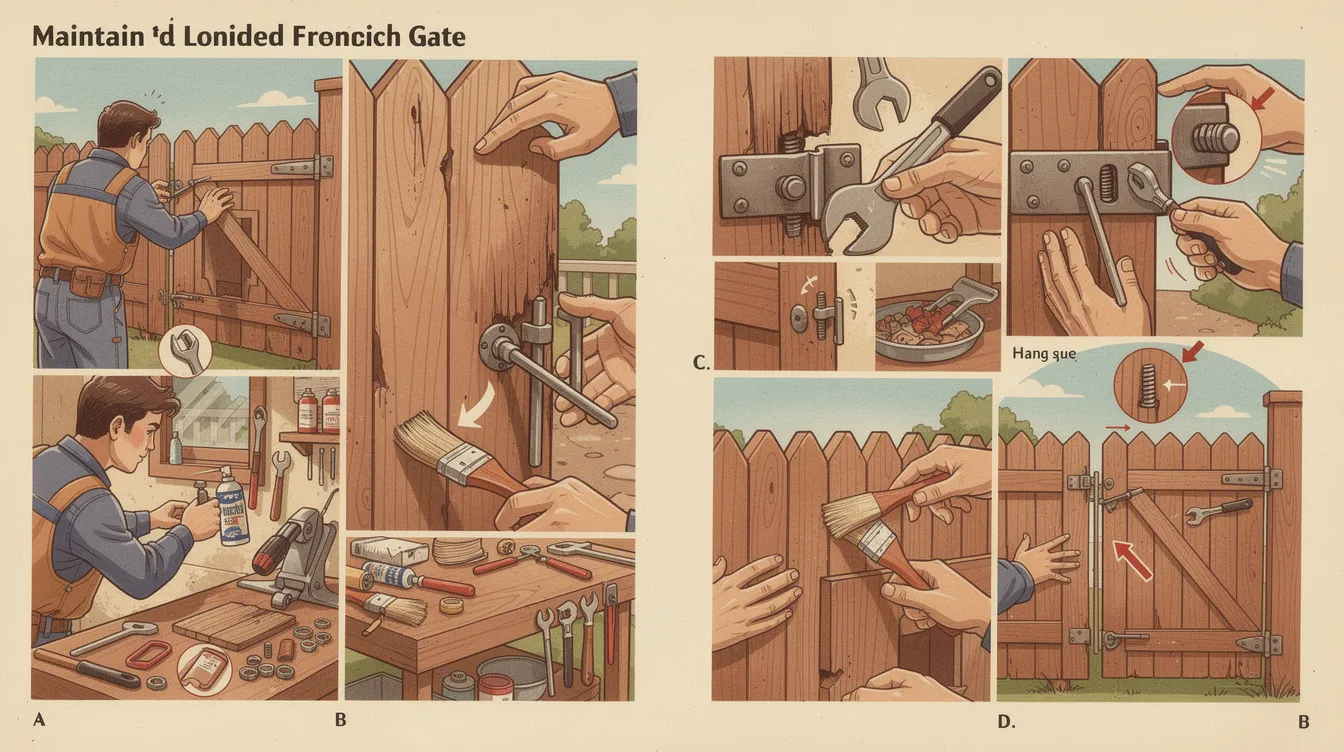
Routine maintenance protects your investment in a fence gate. Regular inspections and adjustments maintain the gate’s structural integrity. Tension braces or anti-sag kits provide support for larger gates, preventing sagging.
These measures keep your gate sturdy and functional over time. However, if the gate frame or structure is severely damaged, replacing the whole gate may be the best option for restoring security and function.
Regular Maintenance Routine
Biannual inspections in the spring and fall help catch issues early. Tighten screws and make minor latch adjustments as needed during these inspections to repair any identified problems.
Annual cleaning removes dirt and mildew, maintaining the gate’s appearance and longevity. These simple maintenance steps keep your gate in top condition.
Preventing Sagging Gates
Preventing sagging is crucial for long-term gate performance. Diagonal braces secure the gate against sagging. Running a cable from the top hinge corner to the bottom latch corner creates tension-based support, including the use of compression bracing.
Cable and turnbuckle kits provide additional support, ensuring the gate maintains its structure. These techniques help prevent sagging, keeping the gate functional and attractive.
Enhancing Security Features
Enhancing the security features of your fence gate deters unauthorized access and improves overall safety. Implementing various security features protects your property and provides peace of mind.
These measures keep your gate secure and protect your property safe.
Adding Lock Mechanisms
Choosing and installing keyed locks enhances privacy and security. Keyed dual-access latches secure gates from both sides, while mechanical keypads offer security without physical keys. Proper alignment and secure attachment ensure functionality and ease of use, including the use of a gate lock.
Combining different lock types enhances security while maintaining convenience.
Installing Anti-Sag Kits
Anti-sag kits maintain the structural integrity of your fence gate. These kits typically include cables and brackets to keep the gate aligned and prevent sagging.
Secure the cable from the top corner of the gate to the bottom opposite corner, adjusting the turnbuckle for proper tension. This installation ensures long-term performance and stability.
Common Mistakes and How to Avoid Them
A common mistake in DIY fence gate projects is not ensuring the gate is sturdy enough for heavier elements, like large dogs. An insufficiently strong gate may sag or fail, compromising your fence’s security.
Use high-quality materials and support the frame at multiple points to build a robust, reliable gate. Failing to dig holes deep enough for your fence posts can compromise the stability and security of the gate, so make sure to dig holes properly when installing posts.
Measuring Errors
Accurate measurements are the foundation of a successful gate installation. Common pitfalls and best practices include:
- Measuring only once, which can lead to errors.
- Using the wrong tools, resulting in improper fit.
- Double-checking measurements at multiple points to ensure a snug fit.
These steps help prevent issues like binding or gaps.
Accurate measuring ensures smoother installation and the gate’s long-term functionality and appearance.
Improper Brace Installation
Improper brace installation can cause gate sagging and warping over time. Correctly positioned braces distribute the gate’s weight effectively, preventing sagging and extending lifespan. Properly installed braces maintain structural integrity, ensuring the gate remains sturdy and reliable.
This careful attention to brace installation is crucial for a long-lasting gate.
Summary
Building a secure fence gate is a rewarding project that enhances the safety and aesthetic appeal of your property. From planning and measuring to selecting materials and installing hardware, each step is crucial for a successful outcome. Regular maintenance and the addition of security features ensure your gate remains sturdy and functional over time. By following this guide, you’ll create a gate that not only looks great but also stands the test of time, providing security and peace of mind.
Frequently Asked Questions
How do I ensure my gate fits the opening properly?
To ensure your gate fits perfectly, measure the opening at various heights and make sure the gate is 1/4 inch narrower than the opening for wood expansion and hinge clearance. This simple tip will help you avoid fitting issues later on.
What type of wood is best for building a fence gate?
Cedar is the best choice for building a fence gate because it’s naturally resistant to decay and weather, while pressure-treated lumber is great for the frame. So, go with cedar for longevity and durability!
Why is it important to pre-drill holes when attaching boards?
Pre-drilling holes is crucial because it prevents the wood from splitting and guarantees a strong, clean connection between the boards. This simple step can make a big difference in the durability of your project!
How can I prevent my gate from sagging over time?
To keep your gate from sagging, consider installing diagonal cross braces and using anti-sag kits. This simple step will help maintain its shape over time.
What maintenance routine should I follow for my fence gate?
To keep your fence gate in great shape, make sure to inspect it twice a year, tighten any loose screws, check the latches, and give it a good cleaning once a year. This routine will ensure it functions well and looks good too!